 |
| Mr. Blue Frog |
|
Well, here I am again and with another "soul" inspiring blog, as if I don't have enough blogs to keep me busy with my card-making blog, photoblog and writing blog. Now, "Restoring My Soul" blog dedicated to all things I re-create, re-vamp, recycle, redecorate, refurnish, refurbish, etc. Hence, the idea behind 'Restoring My Soul'.
And, what better way to introduce the blog than with a photo of my favorite garden buddy, Mr. Blue Frog! He's cool blue on the outside, kicking back and taking in all the fresh air under a Carolina blue sky (most days) in my garden. So, probably not so much of a coincidence that I gave his old grey skin a coat of Carolina blue spray paint. I don't know why I didn't give him a new look sooner because he is a beacon of inspiration in my garden.
As you can tell by this photo (left), Mr. Blue Frog used to be grey and is missing a foot. So, with a can of blue spray paint, he can forget about his lost appendage and relax in his newfound setting in our backyard garden transformation (still ongoing).
We have now resided in our home in central NC for 7-1/2 years and it has only taken us 7-1/2 years and about 10 bags of grass seed to finally concede that there are just certain areas of our yard that are never going to see a blade of grass. Thus, our rock garden was born. However, I have to admit that this idea came about more out of the need to preserve the indoors from the seasonal accumulation of dirt and mud that comes from having two dogs and little grass.
Yet, as you can see in the before and after pictures, it has not only served it's original, inexpensive solution to avoiding muddy paws on carpet, but it surpassed our expectations for any aesthetic visionary pleasure that we had perceived as a plus to the endeavor.
These 'Before' photos say it all ---- sad, sad, sad, at least for the humans in our household! We tried everything to get grass to grow in this spot. We thought we were successful this past spring only for the summer drought to come along and purge every last little green blade that had sprouted in this area! Our dogs, Cricket (jack russell) and Riley (border collie) have both thoroughly enjoyed the cool dirt on many hot Carolina days but that is about to be history!

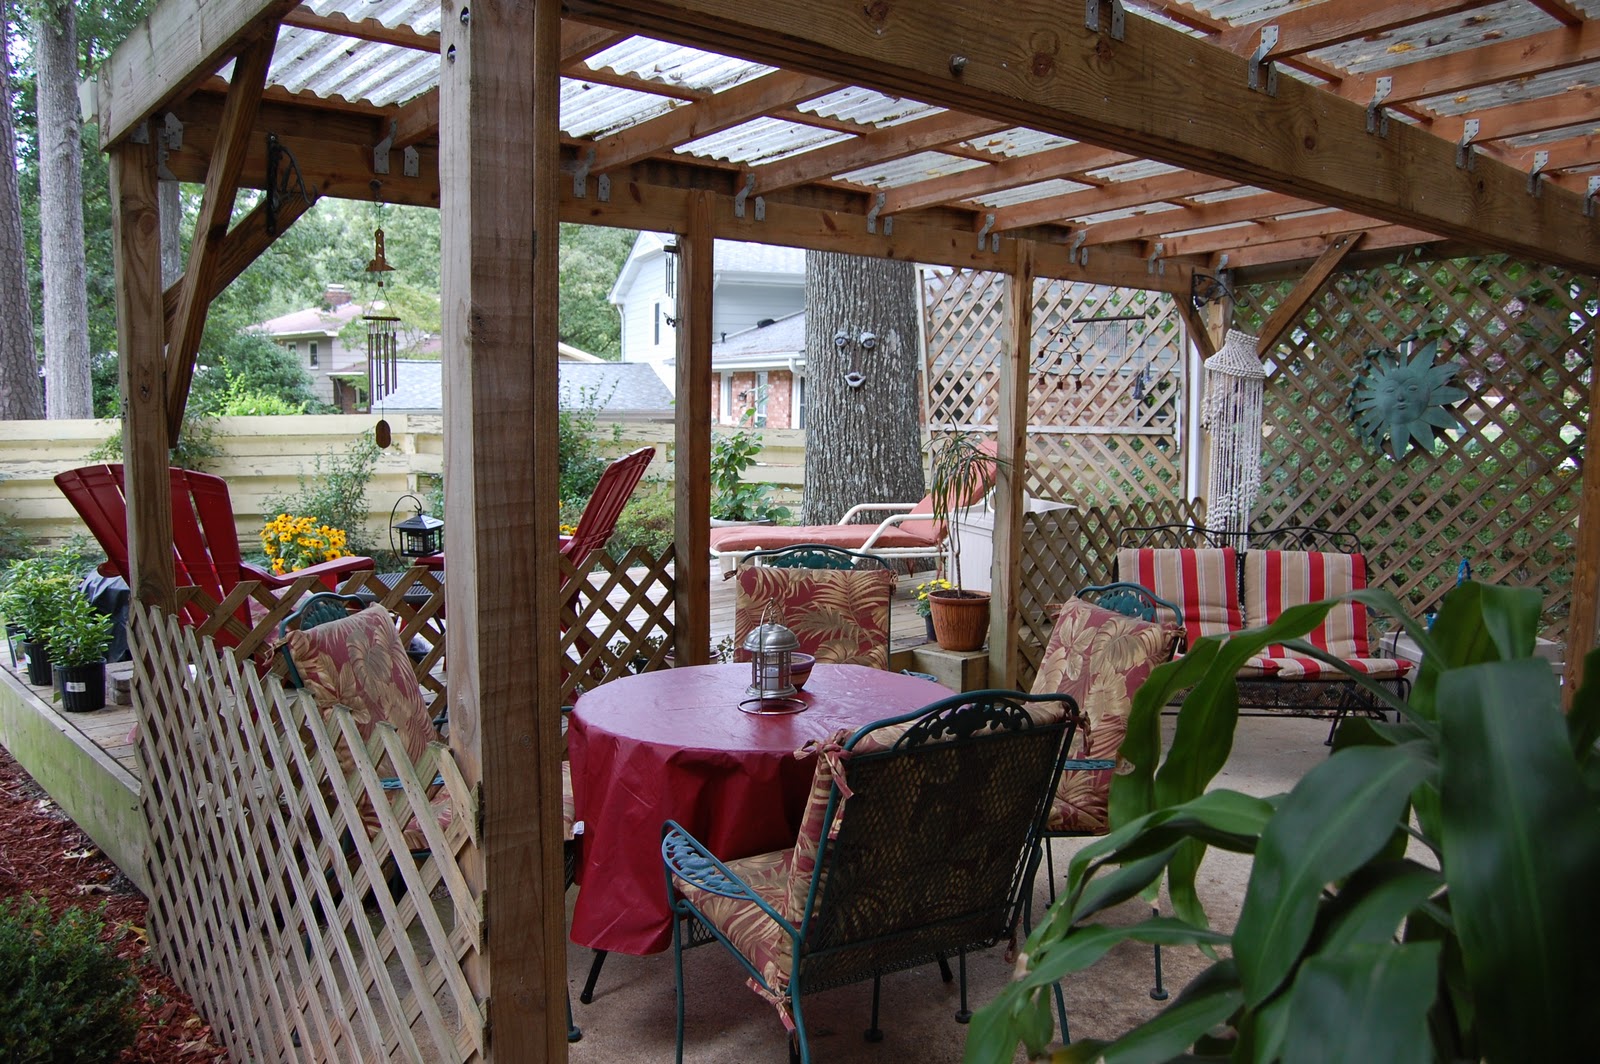
I knew I wanted most of the plants in the area to be potted, so the night before pouring all the river rock, we placed the black edging and stepping stones where we thought we would want them. We bought inexpensive black plastic edging that snaps together and pounds into the ground easily, as we are not sure the rock garden will be a permanent fixture as of yet. My vision was to create a peaceful and serene garden alongside our deck and patio (earlier DIY constructions of the hub's and myself).

It didn't hurt when photographing our preliminary 'sketch' for the pups to pose (lounging to the left in THEIR lounge chair). Yet, I must point out that one of them (Riley, the border collie) is not so thrilled with our garden re-construction.
 |
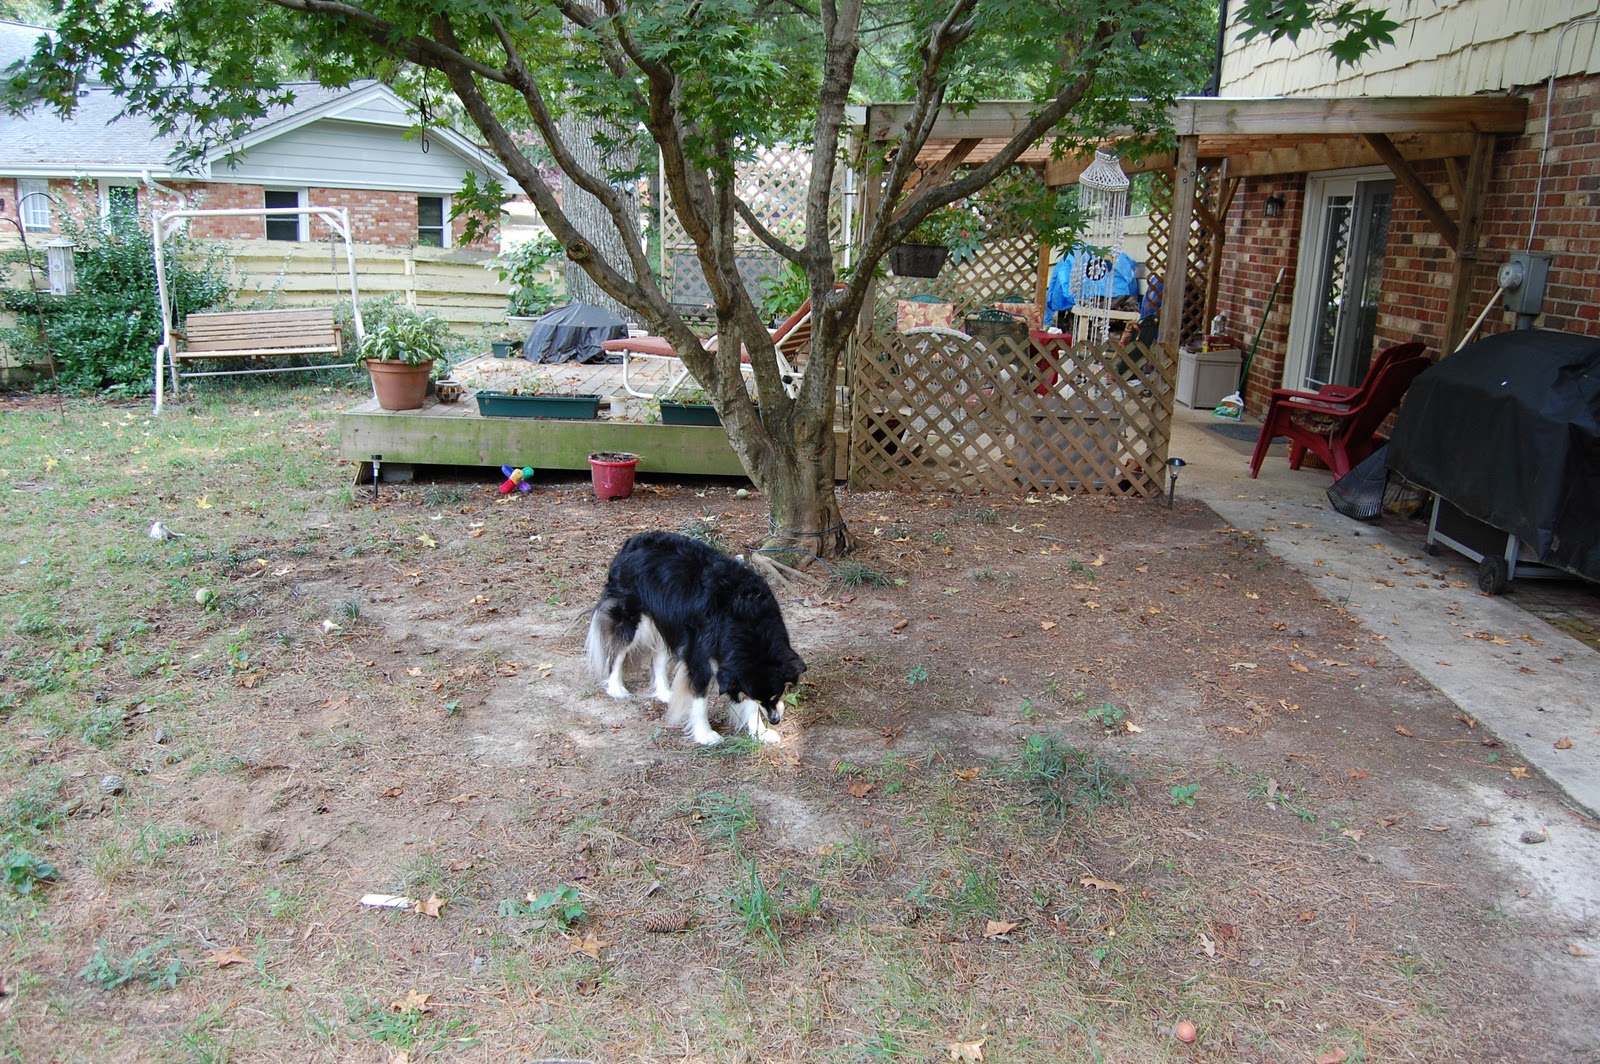
| Riley's Post |
One of Riley's favorite nighttime rituals is to sit underneath this Japanese Maple and "watch" the yard from various angles. We have not only disrupted his nightly guard post (photo: Riley's Post), his ritual running route from the patio to underneath the tree and out to the other end of the yard, but have also destroyed about 3/4 of his latrine. Needless to say, Riley's disdain has been duly noted by the loss of one new bush so far due to his 'protest of disgust'.Since the garden has been finished, he has adapted to the loss of the cool dirt underneath the tree by either sitting on the deck or farther out in the center of the yard not 'rocked'.
The next day -- planting and laying river rock.
New bushes alongside patio/deck. I am presently trying to revive the middle one from Riley's wrath! In the above photo, was before I decided not to plant liriope around the maple tree base. I was going to plant a wreath of liriope around the base of the tree, but the roots extended out so far on one side that it would have been an odd shaped wreath. So, I decided to put the red mulch there instead.
Liriope lining rock garden edge.
Almost done!
DONE!
Not too shabby. As I usually do in decorating, redoing, etc, the metal glider in the rock garden wasn't working for me. I wanted a more natural look so moved an old wooden bench from the front porch to the back for Mr. Blue Frog and a basket of almost spent transplanted impatiens.

By accident, over the years, our patio and deck have emerged into a red/yellow theme, I guess to compliment the brick and (UGLY) yellow painted cedar shake siding. So to bring out some whimsy and fun into the area, I repainted my grey garden frog and carried the same blue over onto the patio with a repainted basket to hold mosquito repellent and candles. Then added a couple more garden statues and a colorful flag of birds (the hubs is a bird lover).


At least near the house, the deck and in and around the patio is beginning to look nicer and become a place to relax and enjoy. From this angle there is a view of another portion of our transforming garden near our new shed (another one of our DIY projects).
We still have a long way to go before we have our garden oasis. Yet, as with everything else, most of the fun is the journey getting there and we are enjoying the journey a bit more than before. The list seems to grow longer with each project we complete. Guess that's homeownership for you!
I don't know why it has taken me so long to start this blog as I have been decorating, redecorating, recycling, revamping, creating and recreating for as long as I can remember. I intend to post past projects here as I dig out the photos, mostly of the finished product.
One of my intentions with this blog is to document my projects a little better from beginning to end with lots of the middle action. I hope some of my endeavors posted will act as inspiration for blog visitors own DIY soul restoration, whatever that may be.
Until my next post ---
"If you have an apple and I have an apple and we exchange these apples then you and I will still each have one apple. But if you have an idea and I have an idea and we exchange these ideas, then each of us will have two ideas. "
~George Bernard Shaw


